Every access control project comes down to this one entity. You can have a healthy unit, clean wiring, and a full cardholder database, but until the door is created and configured correctly in Config Tool, nothing unlocks.
This guide walks through creating a door in Genetec Security Center from scratch: the entity, the hardware assignments, the door behavior settings, and how to verify it all works in Security Desk.
Prefer to follow along on screen? The video below walks through the complete process in Config Tool, including creating the door, assigning its reader and inputs.
Before you start
Three things need to be in place:
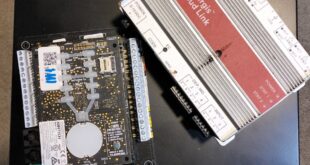
- The access control unit is online. Open the Access control task in Config Tool and confirm the unit shows as online. A door assigned to an offline unit will look fine in the configuration and do nothing in the field. If the controller has not been enrolled yet, watch my video first: adding and configuring LP1502 and MR52 unit in Genetec Security Center.
- The interface module is discovered. Your reader interface module needs to appear under the unit, with its address matching the DIP switches you set on the board. (If you’re double-checking your math, you can quickly verify your panel address using this binary addressing calculator
- The field wiring is landed and documented. Know which reader is on which port, and which input terminals carry the door contact and the request-to-exit device. Guessing here is where most of the troubleshooting time goes.
Step 1 — Create the door entity
In Config Tool, go to the Access control task and select the Doors view. Click the add entity button and choose Door.
Name it the way the building is labeled, not the way the drawing is labeled. Door 12 means nothing to a guard at 2 a.m.; L1 - Main Entrance does. Pick a naming convention early — floor, area, door function — and hold to it across the whole site, because that name is what shows up in every alarm, report, and event search from now on.
Assign the door to the correct partition and area if your system uses them.
Step 2 — Assign the hardware
Open the Hardware tab of the new door. This is where the logical door gets bound to physical terminals.
Select the access control unit, then the interface module the door is wired to. Once the module is selected, the available connections populate and you can assign each device:
- Reader (entry side) — the reader people badge at to come in.
- Reader (exit side) — only if you have a second reader for badge-out. Leave it unassigned on a single-reader door.
- Door sensor — the door contact input. Without it, the system has no idea whether the door actually opened or closed, which means no door-forced and no door-held-open events. For a quick refresher on the physical components, review how door contacts work
- REX (request to exit) — the motion sensor or push button that lets someone leave without generating a forced-open alarm.
- Door lock — the relay output driving the strike or maglock. Ensure you’ve mapped the correct output for your specific type of electrified door hardware
Double-check the input numbers against your wiring sheet before moving on. A door contact landed on the input you assigned to REX will produce behavior that looks like a software problem and isn’t.
Step 3 — Configure door behavior
The Properties tab is where you decide how the door treats time.
Standard grant time is how long the lock stays released after a valid badge. Five to seven seconds suits most interior doors. Doors used by people carrying equipment, or accessible entrances, need longer — that’s what the extended grant time setting is for, applied to specific cardholders rather than to everyone.
Entry time is the grace period after a valid read before a door-forced-open condition is evaluated. Set it too short and every legitimate entry throws an alarm.
Door held open defines how long the door can stay open before the system reports it. Loading docks and doors with closers that drift need a realistic value here, or the operators will learn to ignore the alarm entirely — which is worse than not having it.
Unlock schedules let the door release automatically during business hours. If you use one, enable the unlock on first badge option where it’s appropriate, so the door doesn’t sit unlocked at 8:00 a.m. on a holiday when nobody has arrived yet.
Step 4 — Apply access rules
A configured door still won’t admit anyone until an access rule connects cardholders to it. If you need a quick refresher on how permissions are structured, review how access rules work in Genetec Security Center. On the Access rules tab, add the rule that covers this door, then confirm the schedule attached to that rule is the one you intend.
This is worth testing with a real credential rather than assuming, because rule inheritance through cardholder groups is where surprises live.
Step 5 — Verify in Security Desk
Configuration isn’t finished until you’ve watched the door behave.
Open the door in Security Desk and walk through it:
- Badge a valid credential. You should see a granted event, hear the lock release, and see the door state change to open then closed.
- Open the door without badging. You should get a door-forced-open alarm.
- Hold the door open past the held-open delay. You should get a door-held-open alarm.
- Trigger the REX. The door should open with no alarm.
- Try a credential without access. You should see a denied event with the reason. (If you ever get stuck troubleshooting these events, check out our breakdown of the 20 most common reasons you get access denied
If the door state never changes during these tests, your door contact assignment or wiring is the place to look, not the door configuration.
Common mistakes
- No door sensor assigned. The door works, so it passes a quick test — but you’ve silently given up forced-open and held-open monitoring for the life of the system.
- Grant time set too short. Users pull the handle after the relay has already dropped and report the door as faulty.
- Reader assigned to the wrong side. Entry and exit reversed produces confusing event logs and breaks antipassback later, especially when dealing with complex access card and reader technologies
Wrapping up
A door in Security Center is three things stacked together: an entity, a set of hardware assignments, and a set of timing rules. Get all three right and the rest of the access control system — rules, schedules, reports, alarms — has something solid to build on.